What Does a Multimeter Measure?
A multimeter measures three electrical properties:
Voltage (Volts): {The electrical} potential distinction that pushes electrons by a circuit. Measure voltage to examine battery cost or confirm energy in shops.Present (Amps): The movement {of electrical} cost by a conductor, indicating how a lot electrical energy is transferring by a circuit. Measure present to confirm that circuits or units are drawing the correct quantity of electrical energy.Resistance (Ohms): How a lot a fabric opposes electrical movement. Larger resistance means much less electrical energy movement. Measure resistance to examine element continuity, verifying {that a} wire or fuse isn’t damaged.
Fundamental Multimeter Elements
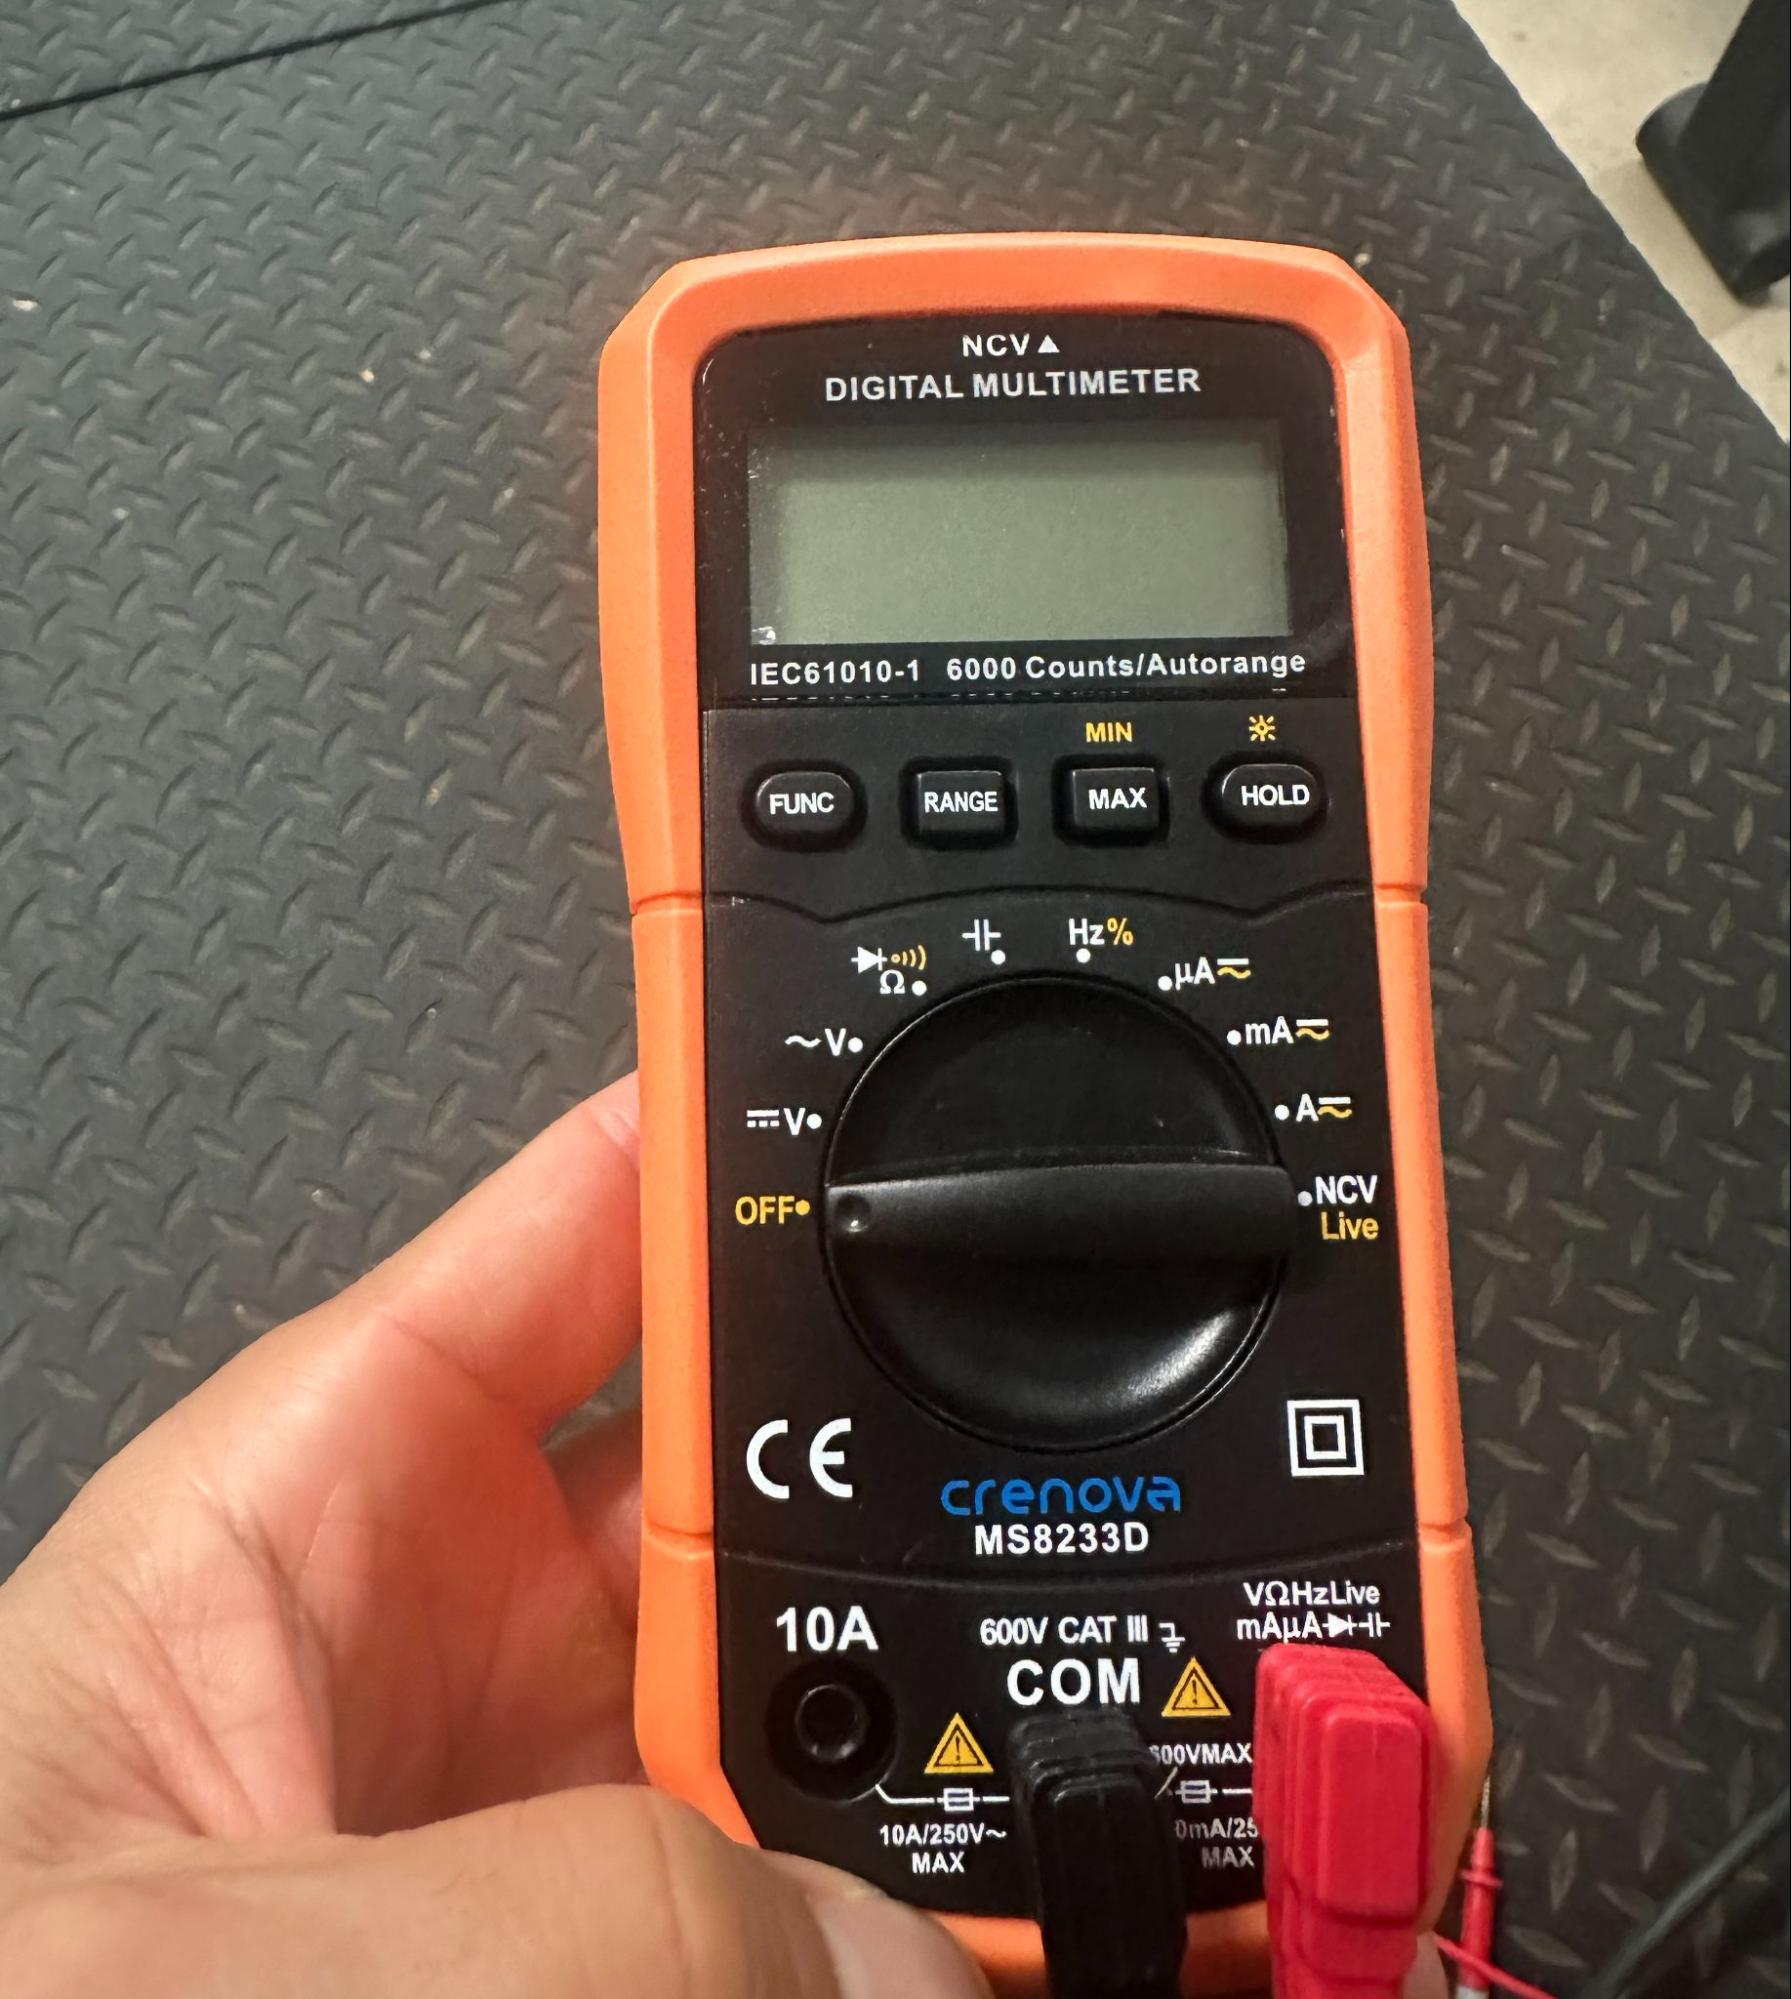
Multimeters are available in analog and digital varieties. One of many good options of digital multimeters is that they’re auto-ranging, that means the multimeter robotically selects the proper measurement vary for the amount you’re testing — voltage, present, or resistance — so that you don’t should manually dial in an anticipated worth vary. That makes digital multimeters simpler for newbies to make use of.
The primary parts of a multimeter (whether or not digital or analog) embody:
Show: Exhibits the measured worth.Dial: Lets you choose what to measure (voltage, present, resistance).Ports: COM (black) and two purple ports: one for voltage, resistance, and milliamp/μA measurements, and one for prime present (as much as 10A). Most professional multimeters separate the ports for measuring voltage/resistance and milliamp/μA. There will probably be a port you utilize while you’re measuring voltage and resistance measurements. By no means plug into the 10A jack until you’re measuring massive currents.Probes: Black (destructive) and purple (optimistic) wires to connect with check factors.
Actual-World Functions
Testing Batteries (Voltage)
You need to use a multimeter to check in case your batteries nonetheless have juice. Right here’s find out how to do it:
Plug the black probe into “COM” and purple probe into the milliamp/μA port.

Flip the dial to DC voltage (~ V).
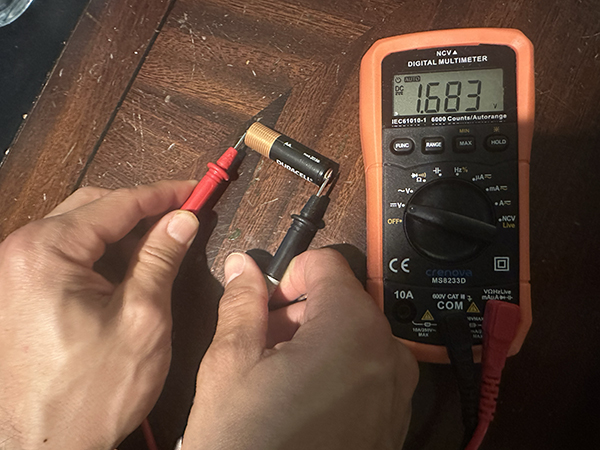
Contact purple probe to battery’s optimistic terminal, black to destructive.
Learn the show — AA/AAA needs to be round 1.5V, 9V round 9V, automobile batteries 12.6V when charged.
Testing for Parasitic Draw (Present)
Just a few years in the past, my automobile wouldn’t begin within the mornings. As soon as I jumped the battery, it was positive. The battery was good. However then a couple of days later, the automobile wouldn’t begin once more. I made certain I wasn’t leaving dome lights on or something.
I ended up taking it to a mechanic, and he used a multimeter to find a parasitic draw from a wi-fi cellphone adapter plugged into the cigarette lighter. Right here’s how I might have used my multimeter to diagnose this alone:
1. Set Up Your Meter
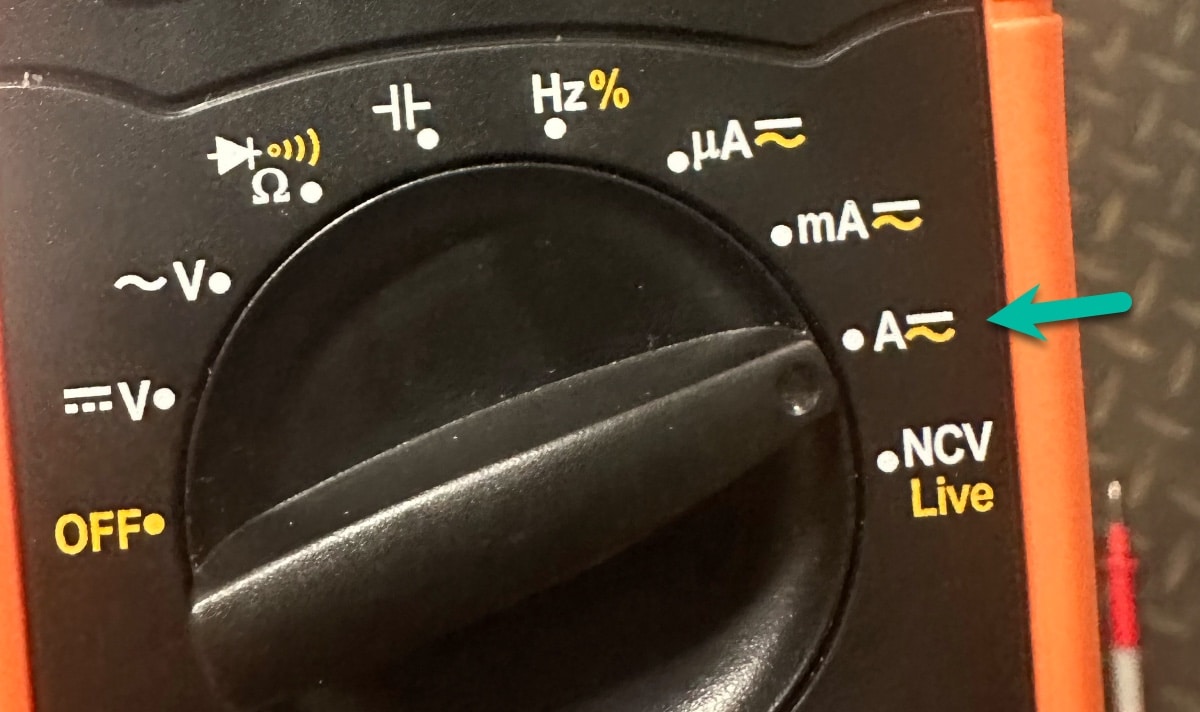
Flip the dial to DC Amps (A⎓ or mA⎓).Plug the black lead into COM.Plug the purple lead into the mA jack.
2. Break the Circuit on the Damaging Terminal
Use a wrench to loosen and take away the destructive battery cable from the battery submit.
3. Join the Meter in Sequence
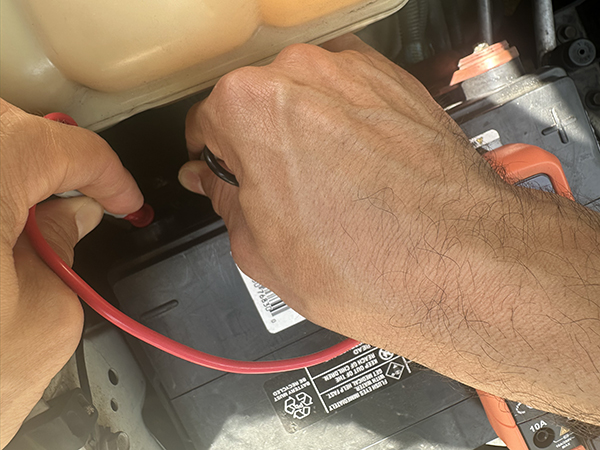
You’re going to position the meter in collection, which suggests you’re connecting it instantly into the trail of {the electrical} present. As an alternative of electrical energy flowing instantly from the battery to the cable, it now flows by the meter first, then continues to the cable. As a result of the meter and cable kind a single steady path (like hyperlinks in a series), they’re stated to be linked “in collection.” This setup lets the meter measure all of the electrical energy transferring by that pathway.
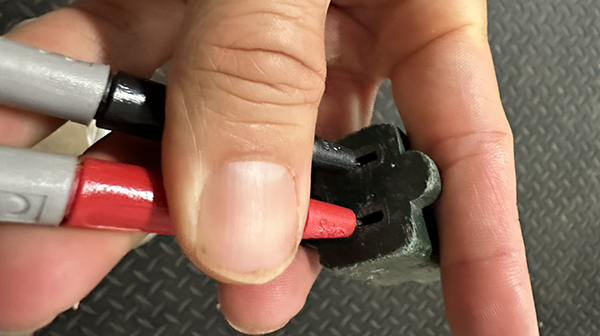
It’s arduous to see what I’m doing on this pic, however it’s this:
Contact the black probe to the destructive battery submit.Contact the purple probe to the unfastened battery cable.You’ve now inserted the multimeter in collection and the battery present is flowing by your meter.
4. Learn the Show
A standard studying is often 20–80 milliamps (0.02–0.08A).Something above 100mA (0.1A) is extreme and warrants investigation.
5. Monitor the Perpetrator
If the meter reads above 100mA:
Have one other particular person begin pulling fuses one after the other from the fuse field.Watch the present draw after each.When the draw drops considerably, you’ve discovered the circuit accountable. From there, hint what’s linked to it.
Testing Extension Cords (Resistance/Continuity)
Extension cords take a beating. Over time, the insulation can crack, wires can loosen, and corrosion can creep into the connections.
A broken extension twine is a hearth or shock ready to occur. Fortuitously, your multimeter makes it straightforward to check cords and catch issues earlier than they change into harmful.
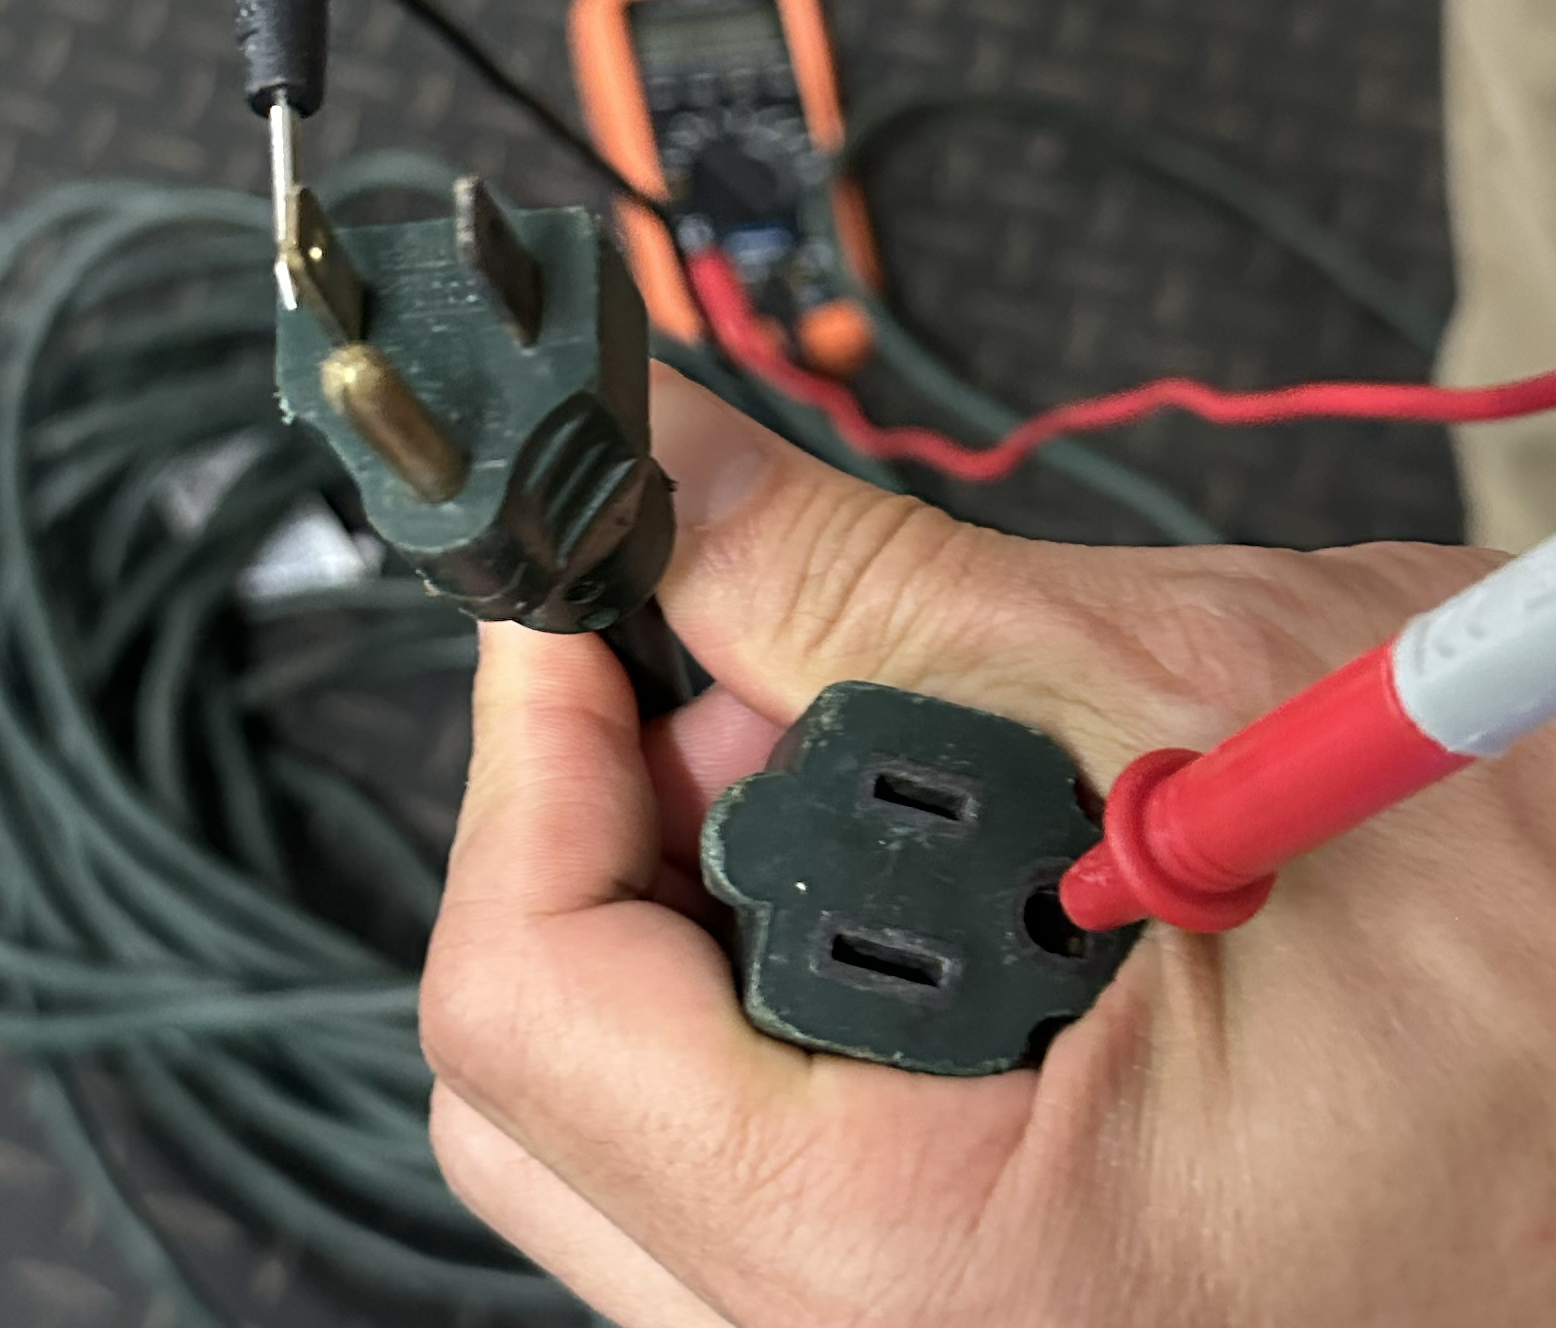
Step 1: Test for Continuity and Shorts
Begin with the twine utterly unplugged.
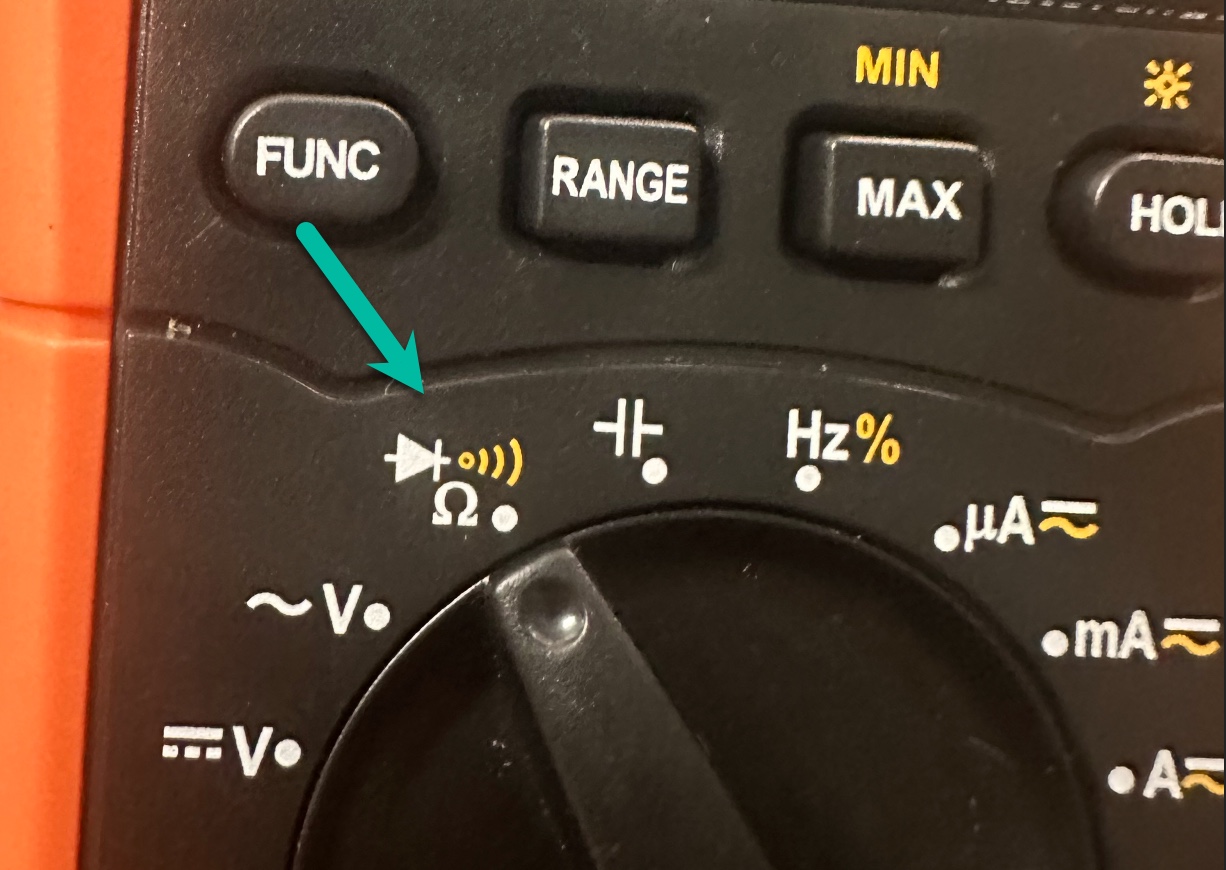
Set your multimeter to resistance (Ω) or continuity mode. Plug the purple probe into the voltage/resistance port.
To check every wire:
Floor:
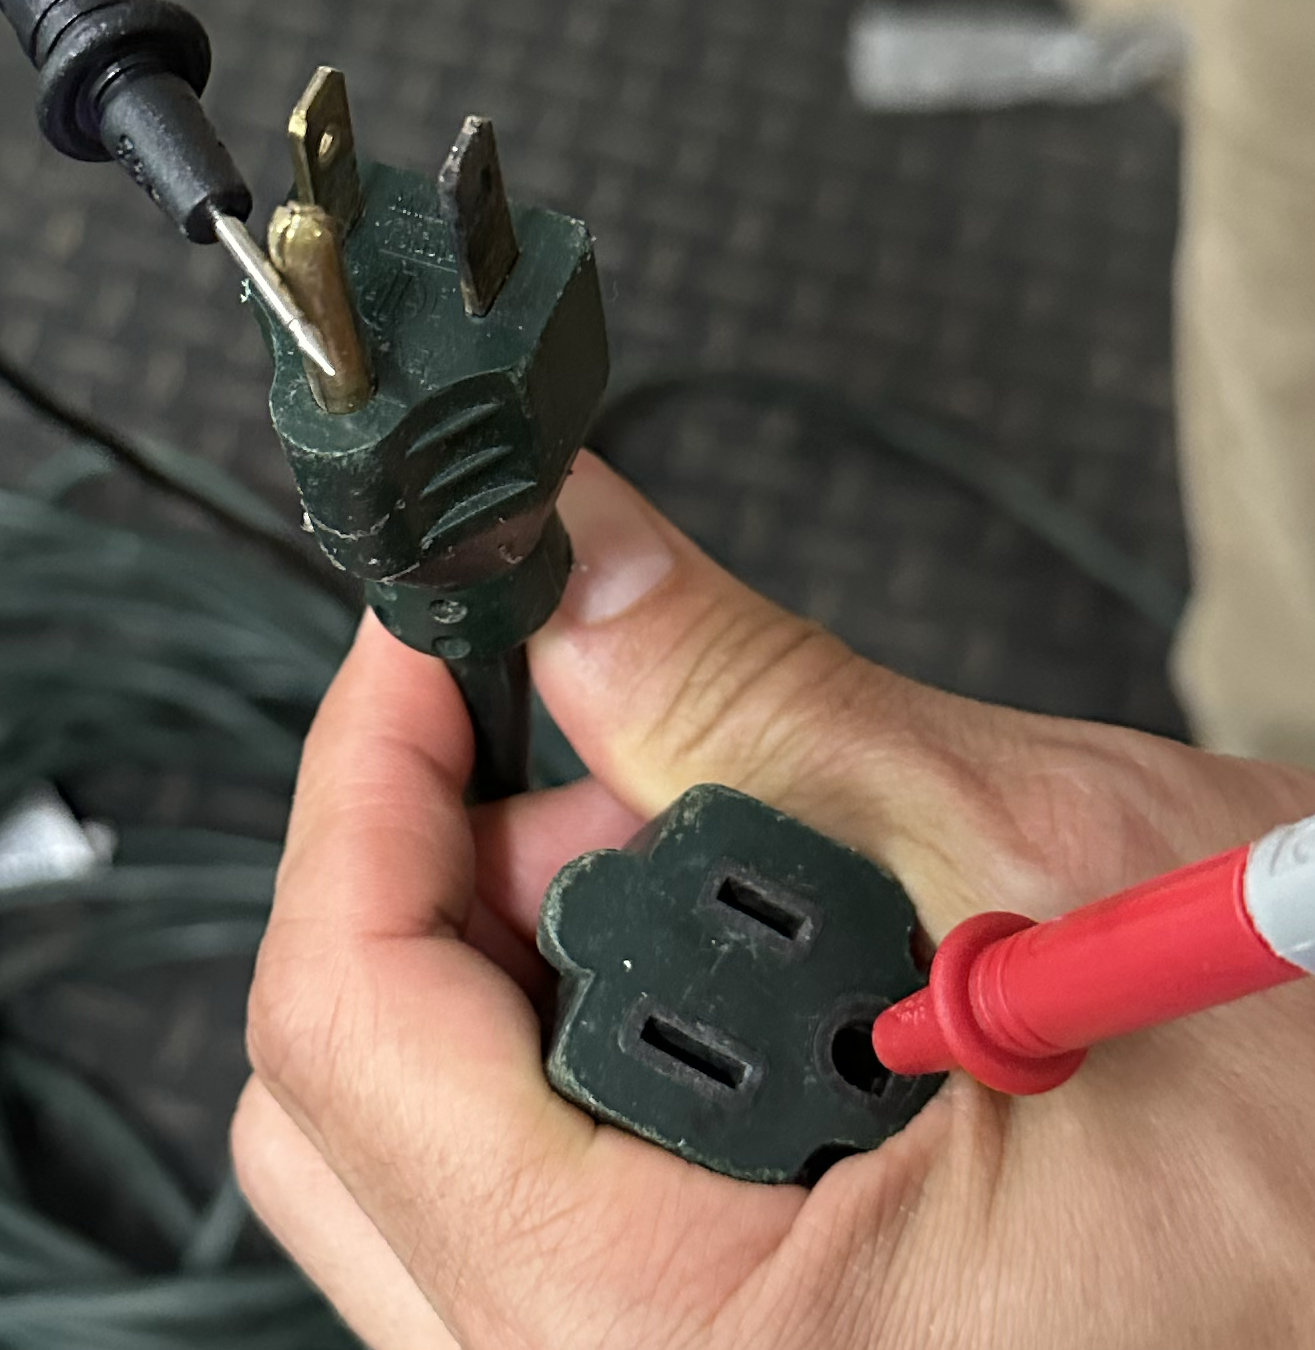
Insert the purple probe into the spherical floor gap on the feminine (plug-in) finish.Contact the black probe to the spherical floor prong on the male (wall plug) finish.Count on a studying below a couple of ohms relying on twine size and gauge. Something over ~5 ohms might point out corrosion or a partial break.
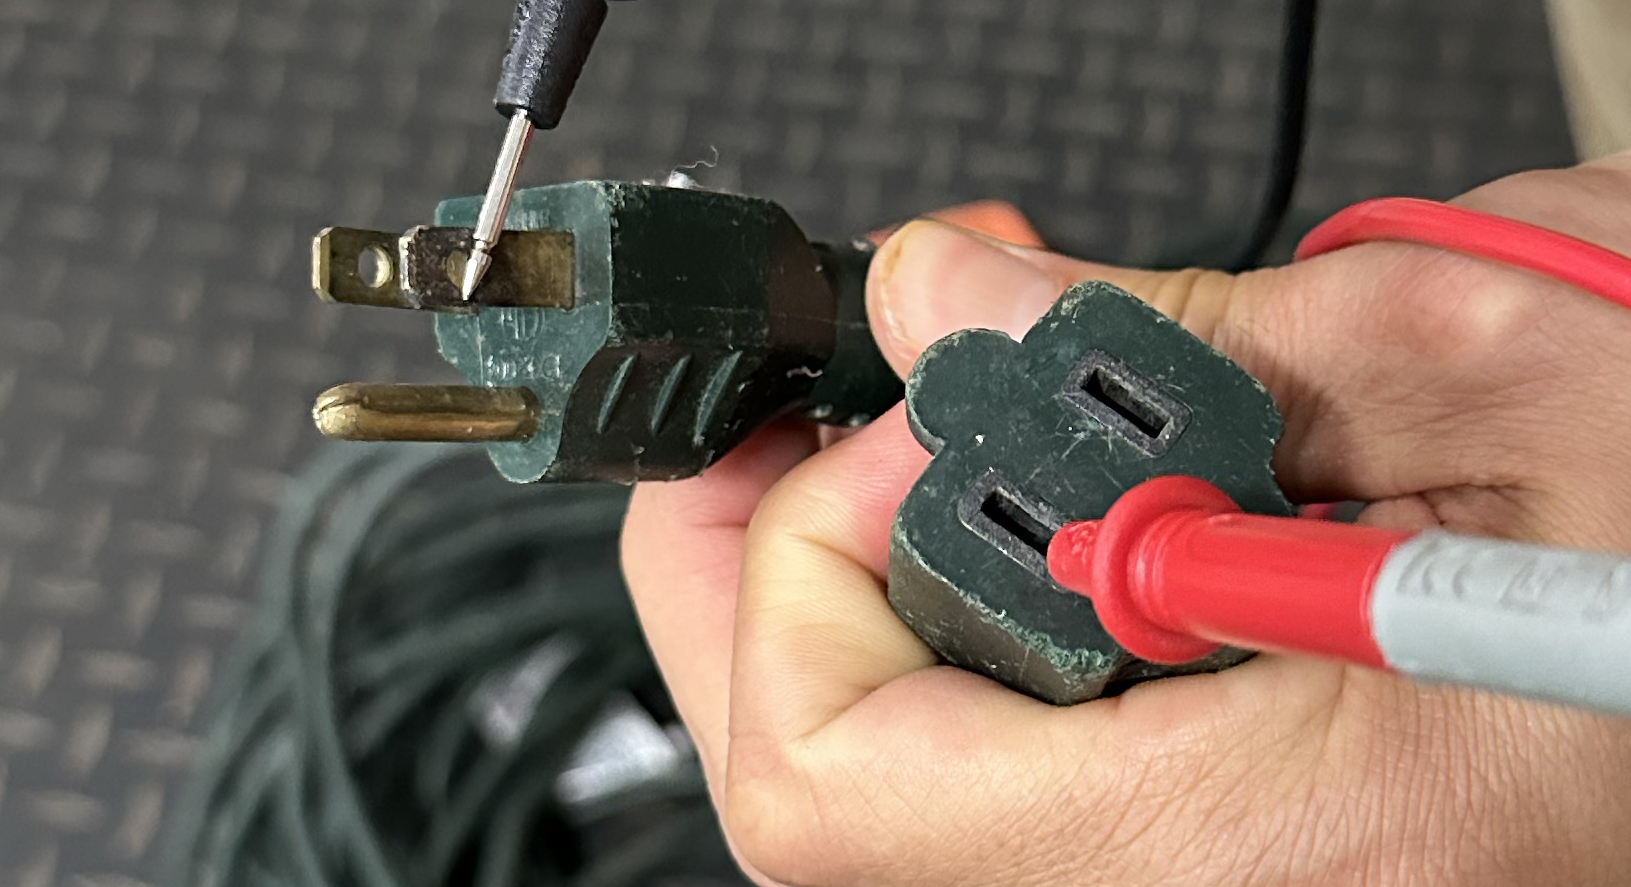
Now examine for shorts:
Hold the purple probe within the floor gap and contact the black probe to every flat prong on the male finish.Your multimeter ought to show “O.L.” or infinity, indicating no connection. When you get a low studying, the twine has a brief and needs to be tossed.
Scorching and Impartial Slots:
Repeat the identical process for the quick (sizzling) slot and lengthy (impartial) slot:
Match every slot to its corresponding prong and check for continuity (0.8 ohms or much less).Cross-test towards the opposite prongs for “O.L.” readings to substantiate there aren’t any shorts between wires.
If any check exhibits continuity between circuits that shouldn’t be linked, that twine goes within the trash. It’s not value making an attempt to restore.
Step 2: Take a look at for Dwell Voltage
When you’ve confirmed the twine isn’t broken, you possibly can examine that it’s delivering voltage correctly.
Plug the twine right into a reside wall outlet.
Set your multimeter to AC voltage (VAC).
Insert the probes into the 2 feminine holes of the twine. You need to get round 120 volts.
Transfer one of many probes to the bottom gap (it’s spherical). You need to once more see ~120 volts.
These readings affirm the twine is carrying voltage correctly and safely.
There you go. How one can use a multimeter. Whether or not you’re checking batteries, looking down mysterious electrical issues in your automobile, or ensuring your extension cords aren’t fireplace hazards ready to occur, this easy software can prevent time, cash, and complications.